Social Media Client Onboarding: The Complete Checklist for Agencies and Freelancers
A complete social media client onboarding checklist covering contracts, access, brand assets, content, and reporting for a smooth start.

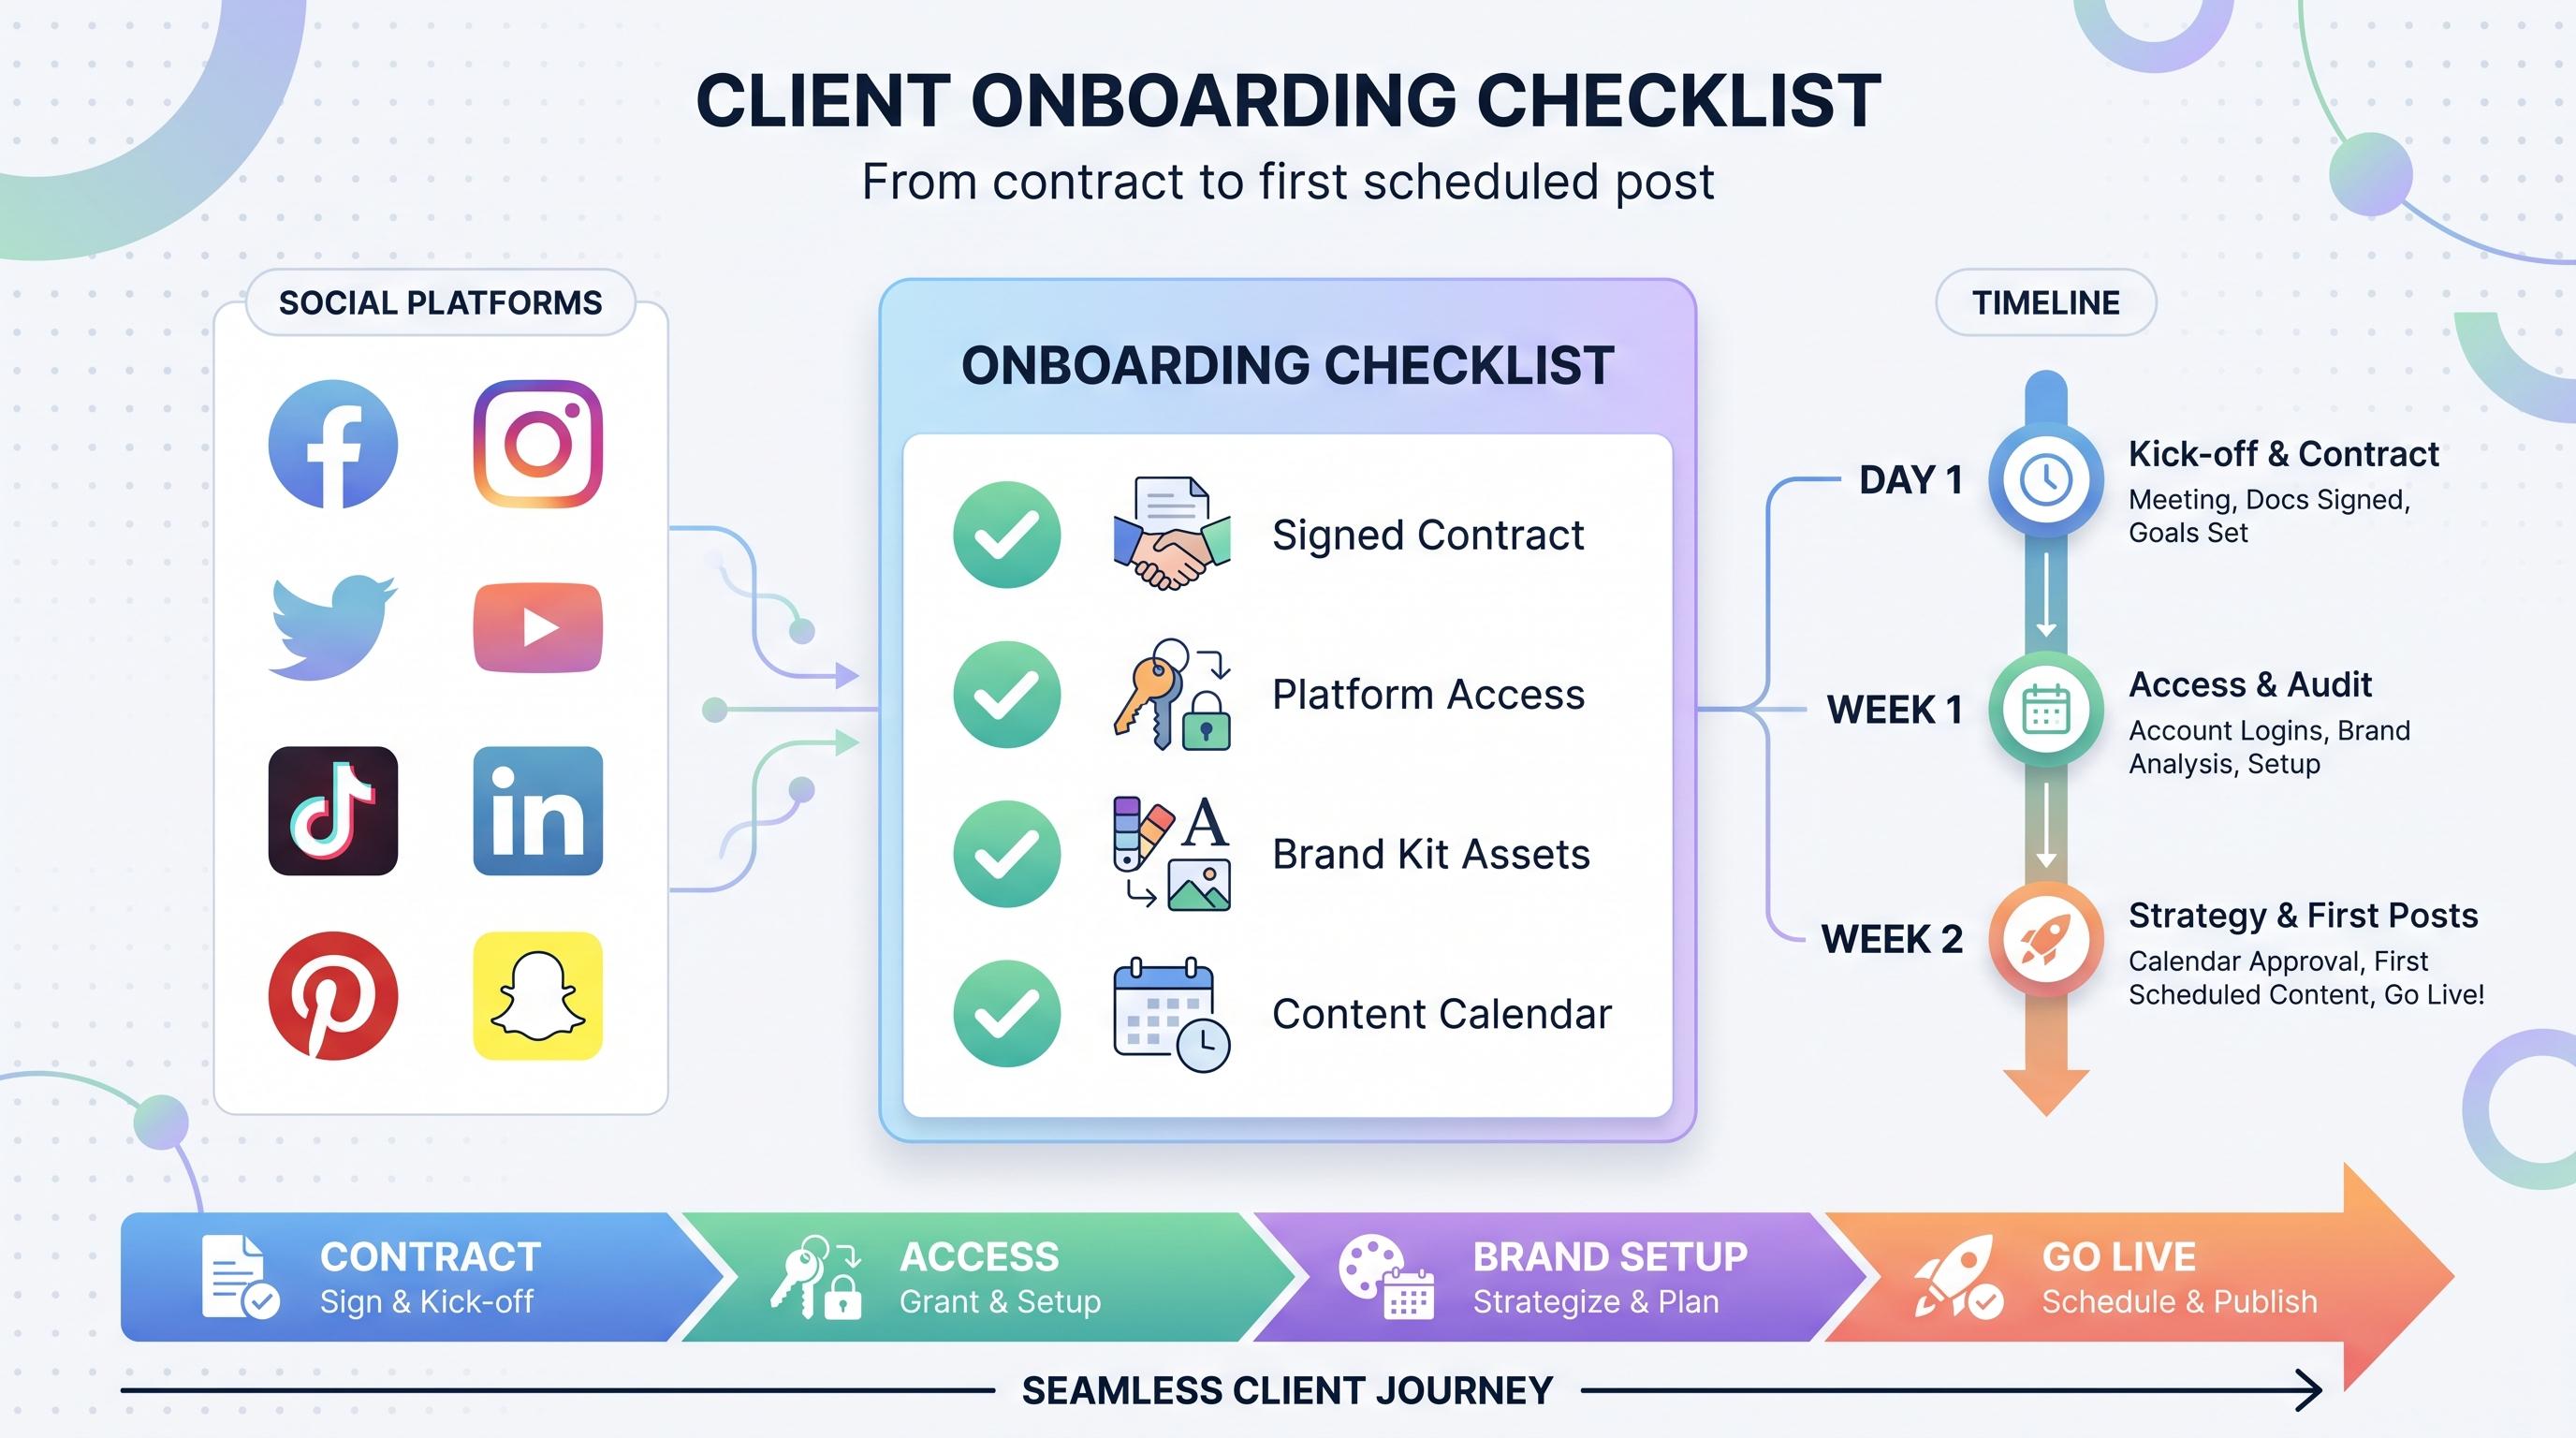
A messy onboarding process costs you more than time. It costs you trust. The first two weeks with a new social media client set the tone for the entire relationship, and if you're chasing down login credentials on week three or asking for brand guidelines you should have gotten on day one, the client notices. See our Telegram scheduling guide.
See It in Action
This is what scheduling a Telegram post looks like in Schedulala
Most agencies and freelancers lose momentum in onboarding not because they lack skill, but because they lack a repeatable system. One client sends you a Google Doc with brand colors. Another forgets to add you as an admin on their Facebook page. A third assumes you already know their brand voice because they mentioned it once on a discovery call. None of this is malicious. It's just what happens without a checklist. Try our social media content approval.
This guide gives you a client onboarding checklist you can actually use, broken into the stages that matter: pre-onboarding prep, the kickoff call, account access, content and brand setup, and reporting expectations. By the end, you'll have a process that gets new clients live on your calendar in days, not weeks. See our content calendar guide.
Try Schedulala for free
Schedule posts to Bluesky, Twitter, and 8 other platforms from one dashboard.
Get started for free→Why onboarding is where most client relationships go sideways
I've talked to a lot of social media managers who can tell you, almost to the day, when a client relationship started to sour. It's rarely a content disagreement. It's usually something small from week one: a late first post, a password that didn't work, a report that showed up without the metrics the client actually cared about. Try our telegram engagement tips get.
A structured onboarding process solves this by removing guesswork. You're not improvising what to ask or when to ask it. You're working through a checklist that's been refined over dozens of clients, which means fewer surprises for you and a much more professional first impression for them. Try our telegram line break generator.
This matters whether you're a solo freelancer managing three clients or an agency onboarding your fiftieth. The scale changes, but the fundamentals don't: get access fast, understand the brand deeply, set expectations clearly, and start posting with confidence instead of guessing. Learn more about telegram font generator.
Stage 1: pre-onboarding, before the kickoff call
1. Get the contract and payment signed first
Do not start onboarding work before the contract is signed and the first invoice is handled. This sounds obvious, but scope creep almost always starts with an eager freelancer who sends a free content calendar draft before anything is official. Set the boundary early: onboarding begins once paperwork is done.
2. Send an intake questionnaire
A good intake form does the heavy lifting before you ever get on a call. Ask about target audience, brand voice, competitors, past campaign performance, existing content they like or hate, and which platforms matter most to them. The goal is to walk into the kickoff call already knowing 70% of what you need, so the call can focus on nuance and questions instead of basic fact-finding.
3. Request access to everything you'll need
Send a single access request list rather than asking piecemeal over several emails. Include every social platform you'll manage, plus any design tools, shared drives, or analytics dashboards. Asking once, clearly, saves you from the slow drip of 'oh, I also need this' messages that make you look disorganized even when you're not.
Stage 2: the kickoff call checklist
The kickoff call is where you turn an intake form into a real understanding of the brand. Don't treat it as a formality. This is the conversation that determines whether your first month of content actually sounds like the client, or sounds like a generic agency filled in the blanks.
4. Clarify goals and success metrics
Ask directly: what does success look like in 90 days? Followers, engagement, leads, website traffic, or just 'consistent presence'? Clients often say 'everything' when pressed, so push for a ranked priority. If they say followers and leads both matter, ask which one they'd choose if they had to pick one.
5. Review brand voice with real examples
Don't settle for adjectives like 'friendly and professional.' Ask them to point to three posts, from their own account or a competitor's, that sound exactly right, and three that feel off. Specific examples give you a usable reference that vague descriptions never will.
6. Walk through the approval workflow
Who approves content before it goes live? One person or a committee? How much lead time do they need? This single question prevents more frustration than almost anything else in the relationship. Agree on a specific window, like 48 hours for approval, and put it in writing.
7. Identify no-go topics and legal constraints
Regulated industries especially need this step. Ask about compliance requirements, competitor mentions to avoid, and any past PR issues you should be aware of so you don't accidentally reopen old wounds in your first month of content.
Stage 3: account access and security checklist
This is the part that trips up even experienced teams. Platforms change their admin structures constantly, and a client who 'gave you access last year for another agency' often has no idea what that actually granted. Go through this methodically, platform by platform.
8. Request admin-level access, not just posting rights
You need enough access to troubleshoot, not just to post. On Meta platforms, that means Business Manager admin access rather than a personal profile being added as an editor. For Google Business Profile, request manager or owner access through the Business Profile Manager so you can respond to reviews and update listings.
9. Use a password manager for shared credentials
Never let credentials live in a spreadsheet or a Slack message. Use a shared vault in a tool like 1Password or Bitwarden so access can be revoked instantly if the client relationship ends, without anyone having to remember every platform they handed off.
10. Set up two-factor authentication properly
Confirm who owns 2FA for each account. If the client's phone number is tied to the authentication and they're on vacation when you need a code, you're stuck. Where platforms allow it, move to an authenticator app that both the client and your team can access, or set up business-level access that doesn't depend on one person's device.
11. Document every platform and account ID
Keep a single reference sheet with the client's handle, account ID, page URL, and the type of access you were granted for each of their channels. When you're managing multiple clients across Instagram, TikTok, LinkedIn, Facebook, Threads, Bluesky, Pinterest, Telegram, Mastodon, YouTube, Twitter/X, and Google Business Profile, this reference sheet is what keeps you from posting the wrong content on the wrong account.
Stage 4: content and brand asset checklist
12. Collect the actual brand kit
Logo files in multiple formats, brand colors with hex codes, approved fonts, and any existing templates. Don't accept 'it's on our website' as a substitute. Websites get redesigned and brand kits get updated; you want the source files, not a screenshot you'll have to recreate.
13. Define content pillars together
Three to five recurring themes (think educational tips, behind-the-scenes, customer stories, product updates, industry commentary) give you a repeatable structure for the content calendar instead of starting from a blank page every week.
14. Build a hashtag and keyword bank
Ask for branded hashtags, industry hashtags they want to be associated with, and any they want to avoid. Do the same for SEO keywords if you're writing captions for platforms like Pinterest or YouTube where discovery matters.
15. Get a competitor list
Three to five competitors the client actually watches gives you a benchmark for tone, posting frequency, and content formats, and it gives you an early warning system if a competitor launches something your client will ask about.
Stage 5: reporting and communication expectations
Vague reporting expectations are a quiet relationship killer. A client who expects weekly updates and gets a monthly PDF will feel ignored, even if your actual work is excellent. Nail this down during onboarding, not after the first complaint.
16. Agree on reporting cadence and format
Weekly, biweekly, or monthly, pick one and stick to it. Decide whether reports are a live dashboard, a shared doc, or a short video walkthrough. Some clients want a two-minute Loom explaining the numbers more than they want another spreadsheet.
17. Set the primary communication channel
Email, Slack, a project management tool, or all three? Decide upfront and resist letting the client scatter requests across every channel, because that's how urgent approvals get lost in a Slack DM that nobody checked.
18. Define response time expectations
Tell the client how fast you'll respond to messages and how fast you need them to respond to approval requests. A simple rule like '24 hour response time on both sides' removes a lot of ambiguity and gives you something concrete to point back to if deadlines slip.
| Onboarding stage | Typical timing | Key tasks |
|---|---|---|
| Pre-onboarding | Before day 1 | Contract signed, intake form sent, access requested |
| Kickoff call | Day 1-2 | Goals, brand voice, approval workflow, no-go topics |
| Access setup | Day 2-4 | Admin access confirmed, 2FA set, password manager updated |
| Content setup | Day 3-7 | Brand kit collected, content pillars, hashtag bank, competitors |
| Reporting setup | Week 1 | Cadence agreed, communication channel set, response times confirmed |
| First content live | Week 2 | First scheduled posts go live, first check-in call booked |
Tools that make onboarding faster
A checklist helps, but the tools you onboard clients into matter just as much. If every new client means setting up a separate login, separate billing, and a separate workflow for each platform they're on, you're adding friction that has nothing to do with the actual work.
This is where a single scheduling platform earns its keep. With Schedulala, you connect a client's accounts across all 12 supported platforms (Instagram, TikTok, Twitter/X, LinkedIn, YouTube, Facebook, Threads, Bluesky, Pinterest, Telegram, Mastodon, and Google Business Profile) from one workspace. You're not juggling three separate tools because one client is on Pinterest and another wants Mastodon.
The account-based pricing also makes onboarding math simple. Schedulala's Personal plan is $29/month for 10 social accounts, Team is $49/month for 25 accounts, and Agency is $99/month for 100 accounts, all with unlimited scheduled posts on every tier. Because accounts are a flat count usable in any combination, you're not stuck calculating how many 'channel sets' a client's five-platform presence will eat into. Ten accounts can be two clients on five platforms each, or one client spread across every platform Schedulala supports twice over.
For agencies onboarding multiple clients at once, that flexibility matters more than people expect. You're not forced to upgrade plans the moment a client adds a sixth platform; you just use another account slot from your existing pool. Schedulala also offers a 7-day free trial if you want to test the onboarding and scheduling workflow with a real client account before committing.
Try Schedulala for free
Schedule posts to Bluesky, Twitter, and 8 other platforms from one dashboard.
Get started for free→Common onboarding mistakes to avoid
- Starting content work before access is confirmed, which leads to delays when the account you were 'definitely added to' turns out to be missing admin permissions
- Skipping the intake questionnaire and relying on memory from the sales call, where details get lost or misremembered
- Accepting vague brand voice descriptions instead of asking for specific post examples the client likes and dislikes
- Not documenting the approval workflow in writing, which leads to disputes about who was supposed to sign off on a post
- Letting communication happen across five different channels instead of agreeing on one primary channel upfront
- Promising a reporting cadence verbally but never confirming the format, so the client expects a dashboard and gets a PDF
- Forgetting to ask about industry compliance rules, which can turn an innocent post into a real problem in regulated industries
- Not setting up two-factor authentication properly, leaving you locked out the first time you need to post urgently
Your client onboarding checklist, condensed
If you only take one thing from this guide, make it this: write your onboarding checklist down once, and reuse it for every client. Here's the condensed version you can turn into your own template.
- Contract and first payment confirmed before any work begins
- Intake questionnaire sent and completed
- Access requested for every platform, tool, and shared drive
- Kickoff call completed, covering goals, brand voice, approvals, and no-go topics
- Admin access confirmed across every social account
- Credentials stored in a shared password manager, not a spreadsheet
- Two-factor authentication set up with access for your team
- Brand kit, content pillars, hashtag bank, and competitor list collected
- Reporting cadence, format, and communication channel agreed in writing
- Accounts connected to your scheduling tool and first content batch scheduled
Try Schedulala for free
Schedule posts to Bluesky, Twitter, and 8 other platforms from one dashboard.
Get started for free→