How to Bulk Schedule Social Media Posts: The Complete Guide to Saving Hours Every Week
Learn how to bulk schedule social media posts and save 10+ hours weekly. Step-by-step guide with templates, tools, and strategies that actually work.
Quick answer
Bulk schedule social media posts by batch-creating content, then uploading and scheduling multiple posts at once using a tool like Schedulala.
- •Bulk scheduling saves 10+ hours per week compared to posting individually
- •Create a week or month of content in one batch session, then schedule all at once
- •Schedulala supports bulk scheduling across 10 platforms for $9/month with unlimited posts
- •Use a content calendar template to plan themes and topics before creating posts

You're staring at five different social media apps, trying to remember what you posted yesterday and what needs to go up tomorrow. Sound familiar?
Most social media managers spend between 6 and 10 hours per week just on posting. That's not creating content or engaging with followers. That's literally just the act of logging in, copying, pasting, and hitting publish across platforms.
What if you could do all of that in one sitting, once a week?
Bulk scheduling isn't just a time-saver. It's a complete mindset shift that separates hobbyist social media managers from professionals who actually grow accounts. I've seen creators go from posting sporadically (and burning out) to maintaining consistent presence across five platforms while working fewer hours.
This guide breaks down exactly how to bulk schedule social media posts, from the strategy behind it to the specific workflows that save the most time. No fluff, no vague advice. Just the system.
Try Schedulala for free
Schedule posts to Bluesky, Twitter, and 8 other platforms from one dashboard.
Get started for free→What bulk scheduling actually means (and why it matters)
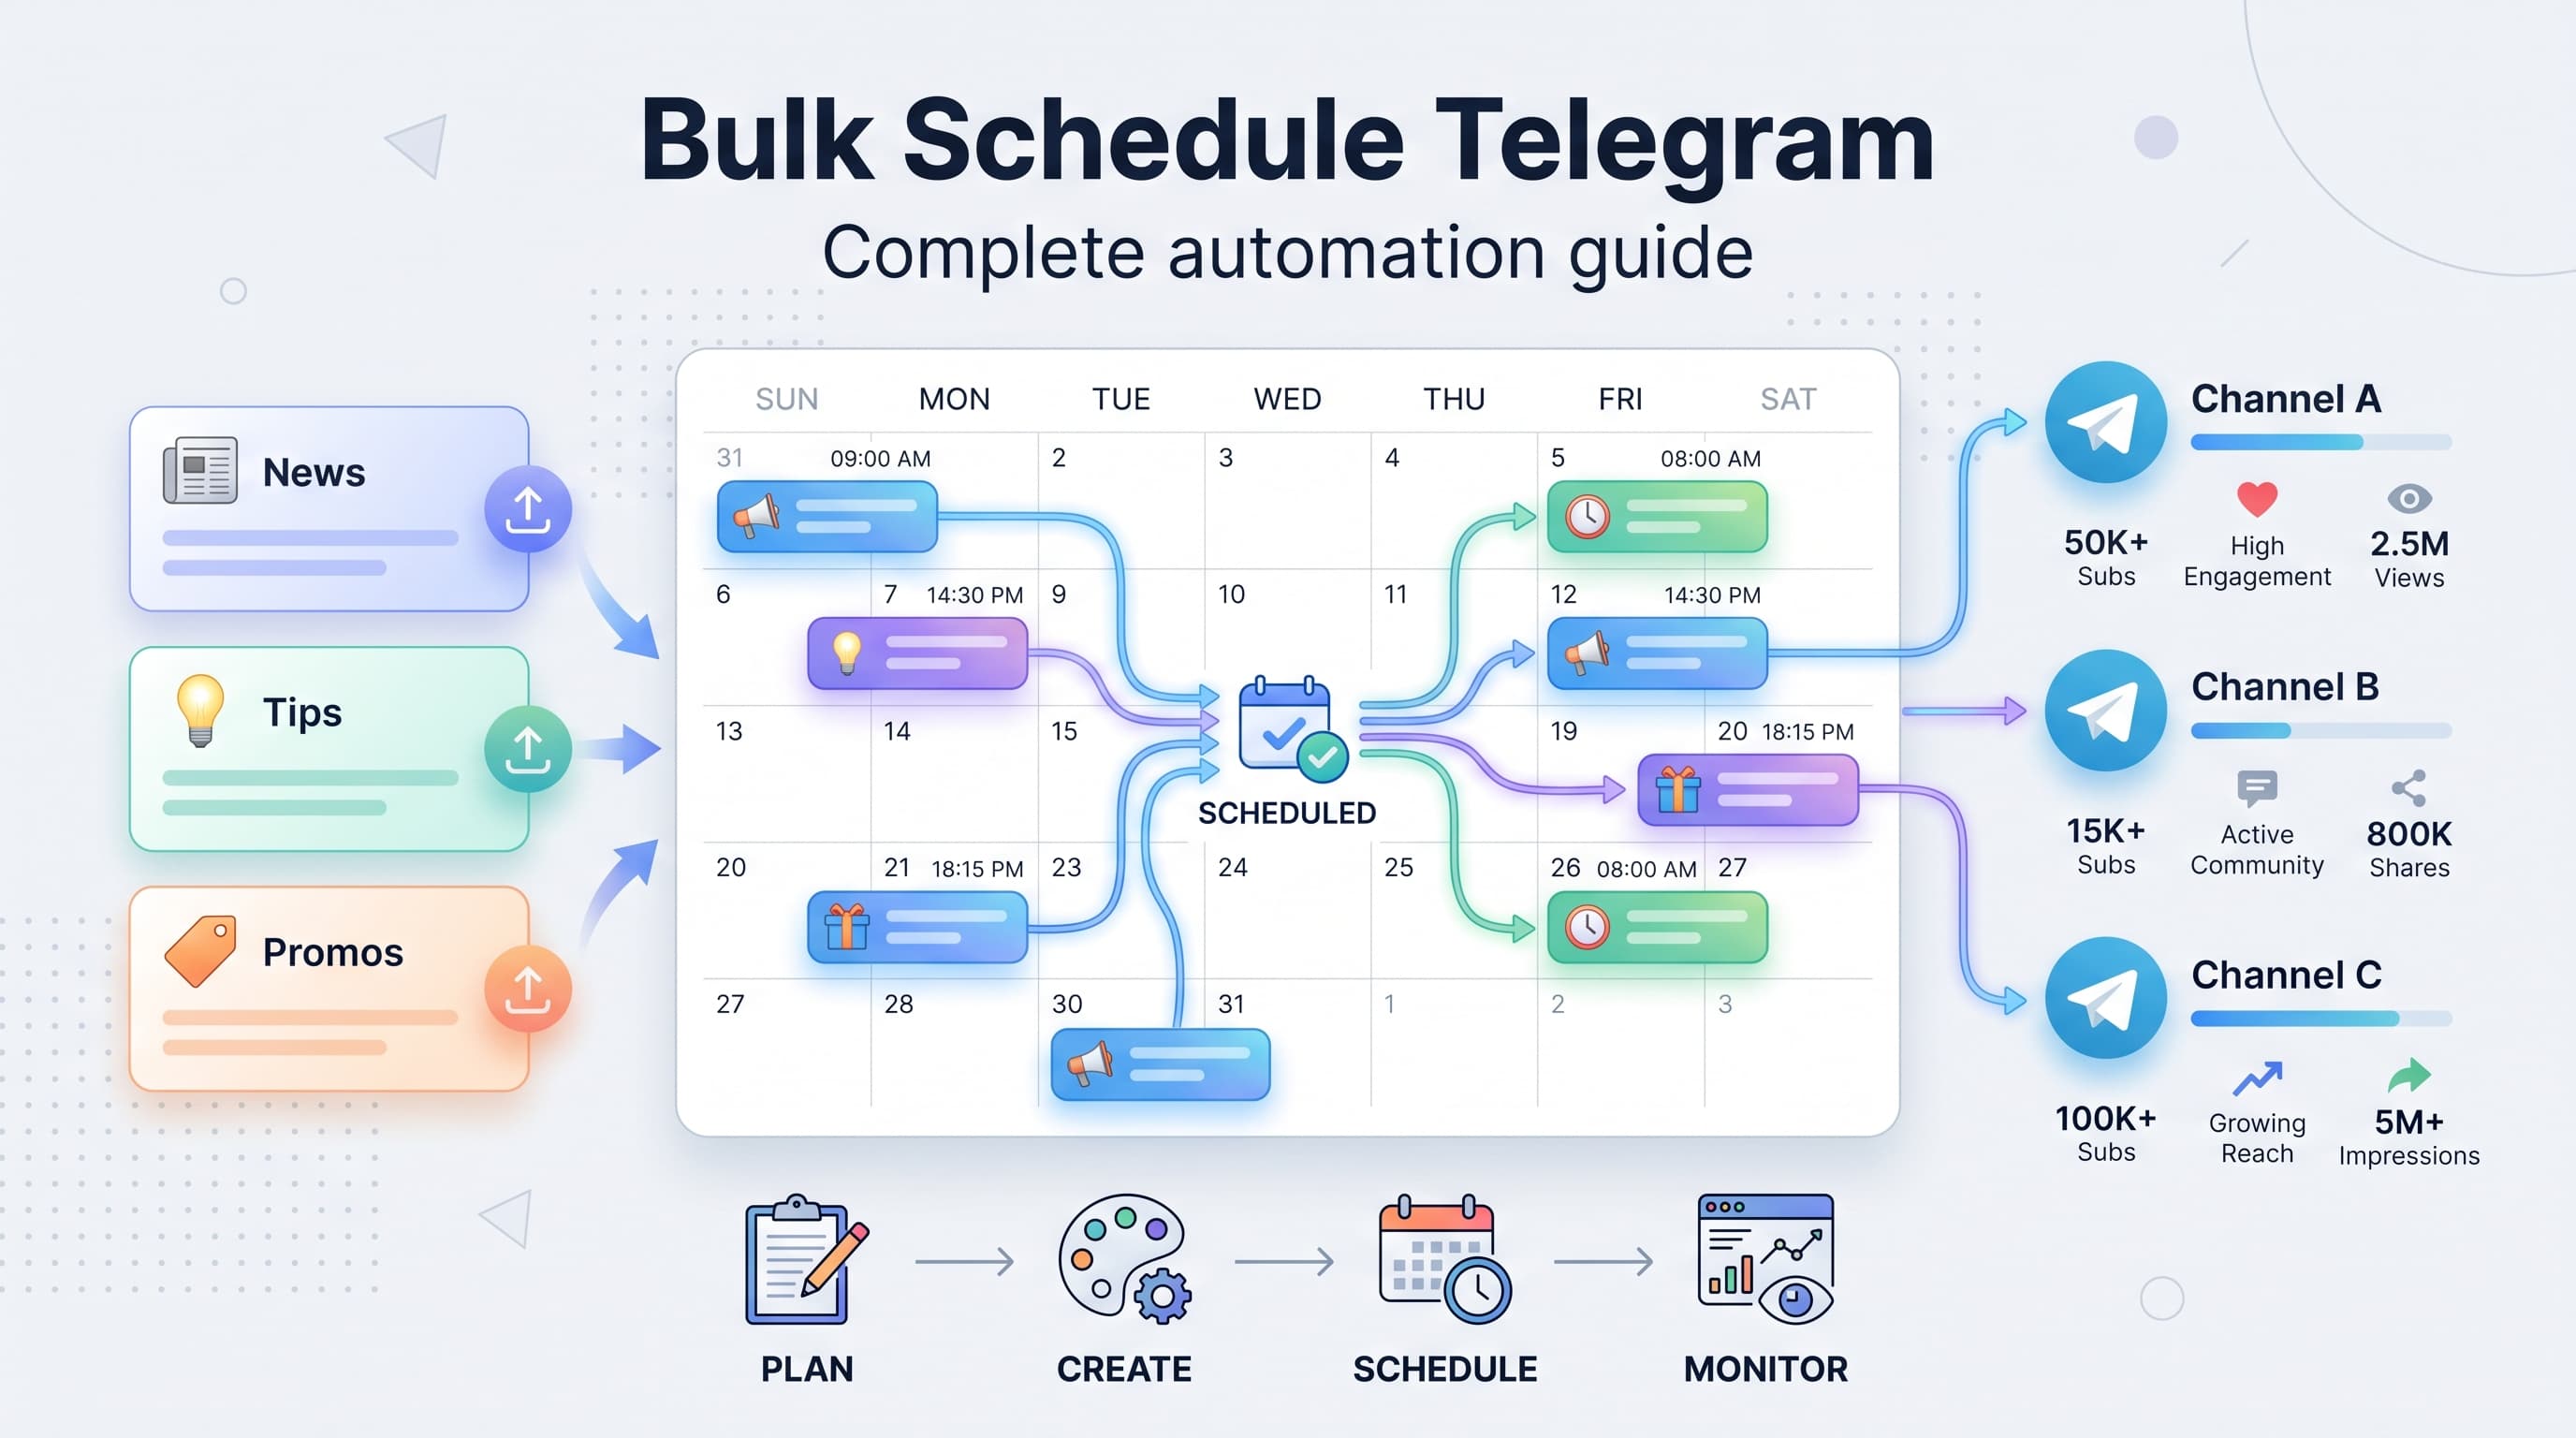
Bulk scheduling means preparing and scheduling multiple social media posts in a single session rather than posting in real-time throughout the day or week. Instead of interrupting your workflow six times daily to post across platforms, you batch the work and let automation handle the rest.
The difference between bulk scheduling and regular scheduling comes down to volume and intention. Regular scheduling might mean queuing up tomorrow's Instagram post before bed. Bulk scheduling means sitting down on Monday morning and scheduling your entire week (or month) of content across every platform you use.
The math behind bulk scheduling
Let's say you post three times daily across four platforms. That's 12 individual posting sessions per day if you're doing it manually. Each session takes about 5 minutes when you factor in logging in, formatting, adding hashtags, and double-checking everything looks right.
That's an hour per day, five hours per week, just on the mechanical act of posting.
With bulk scheduling, that same week of content takes about 90 minutes in one focused session. You've just reclaimed 3.5 hours weekly, which adds up to 182 hours per year. That's more than four full work weeks you get back.
Beyond time savings, bulk scheduling creates consistency. When you're posting in real-time, life gets in the way. Meetings run long, you forget, you're tired, you're traveling. Your posting schedule becomes erratic, and algorithms notice. They reward consistent accounts with better reach.
Bulk scheduling also improves content quality. When you're rushing to post something because it's "time to post," you make compromises. You use the first caption that comes to mind instead of crafting something engaging. You skip the hashtag research. You forget to add a call-to-action. Batching content creation gives you perspective and time to polish.
Before you schedule: the preparation that makes bulk scheduling work
Jumping straight into scheduling without preparation is like trying to cook dinner without checking if you have ingredients. You'll waste time, get frustrated, and probably end up ordering pizza anyway.
Step 1: Audit your current posting situation
Before changing anything, document what you're doing now. Answer these questions honestly:
- How many platforms are you active on?
- How often do you currently post on each?
- What types of content do you share (images, videos, text, links)?
- How long does posting take you right now?
- What's your current engagement like?
This baseline helps you measure whether bulk scheduling actually improves things. It also reveals which platforms might need more attention and which ones you can scale back.
Step 2: Define your posting frequency by platform
Different platforms have different optimal posting frequencies. Posting the same amount everywhere doesn't make sense.
Here's what the data suggests works well for most accounts:
| Platform | Minimum frequency | Optimal frequency | Content lifespan |
|---|---|---|---|
| Instagram Feed | 3x per week | 1-2x daily | 48 hours |
| Instagram Stories | Daily | 3-7x daily | 24 hours |
| TikTok | 3x per week | 1-3x daily | Variable (can go viral weeks later) |
| 2x per week | 1x daily on weekdays | 24-48 hours | |
| X/Twitter | 1x daily | 3-5x daily | 15-30 minutes |
| 3x per week | 1-2x daily | 5 hours | |
| 3x per week | 3-10x daily | 4 months+ |
These aren't rules. They're starting points. Your audience might engage more with less frequent, higher-quality posts. Test and adjust based on your analytics, not generic advice.
Step 3: Create a content mix template
Posting the same type of content repeatedly bores your audience and limits your reach. Before bulk scheduling, decide on your content mix ratio.
A common framework that works across industries:
- 40% value content (tips, tutorials, how-tos, educational)
- 30% engagement content (questions, polls, relatable content, trends)
- 20% brand content (behind-the-scenes, team spotlights, company news)
- 10% promotional content (product launches, sales, direct CTAs)
When you sit down to bulk schedule, this template ensures variety without having to think about it each time.
The step-by-step bulk scheduling workflow
This is the exact process I recommend for bulk scheduling a week of content. Adapt the timeline based on your posting frequency, but keep the sequence.
Step 1: Block dedicated scheduling time (30 minutes prep)
Choose a recurring time slot for your bulk scheduling session. Most people find Monday mornings or Friday afternoons work best. Monday mornings let you plan with the week ahead in mind. Friday afternoons let you close out the week with next week handled.
Block 2-3 hours for your first few sessions. As you get faster, you'll likely need 60-90 minutes for a full week of content across multiple platforms.
During this time, close email. Put your phone on do not disturb. Context switching kills efficiency in batch work more than almost anything else.
Step 2: Gather all your content assets (15-30 minutes)
Before you start scheduling, collect everything you'll need:
- Images and videos (edited and exported in correct dimensions)
- Caption drafts or notes
- Links you'll be sharing
- Hashtag sets for each platform
- Any time-sensitive content (events, promotions, holidays)
If you use a content calendar, this step becomes much faster because you've already mapped out what goes where.
Step 3: Schedule by platform, not by day (45-60 minutes)
Here's where most people get the workflow wrong. They try to schedule Monday's content across all platforms, then Tuesday's, then Wednesday's. This constant switching between platform formats and requirements slows you down.
Instead, complete one platform entirely before moving to the next:
- Schedule all Instagram posts for the week
- Then all LinkedIn posts
- Then all TikTok posts
- And so on
This approach keeps you in the right headspace for each platform's voice and requirements. Your LinkedIn captions won't accidentally sound like Instagram captions.
Step 4: Optimize posting times for each platform (built into Step 3)
Generic "best times to post" advice is mostly useless because your audience isn't generic. What matters is when YOUR followers are online and engaged.
Check your platform analytics before scheduling. Instagram Insights, LinkedIn Analytics, and other native tools show when your audience is most active. Schedule your best content for those windows.
If you're just starting and don't have data yet, use these as baselines:
- B2B audiences: Weekday mornings (7-9am) and lunch hours (12-1pm)
- B2C audiences: Evenings (7-9pm) and weekends
- Global audiences: Test multiple time zones or focus on your primary market
Step 5: Review and quality check (15-20 minutes)
Before you close your scheduling tool, review everything you've queued:
- Check for typos and grammatical errors
- Verify all links work correctly
- Confirm images display properly (no cropping issues)
- Make sure hashtags are appropriate and spelled correctly
- Look at the calendar view to spot any gaps or clusters
This 15-minute check prevents embarrassing mistakes that could take hours to fix or damage your brand.
Choosing the right tool for bulk scheduling
Your scheduling tool can make or break the efficiency of bulk scheduling. The wrong tool adds friction. The right tool makes the whole process feel almost automatic.
What to look for in a bulk scheduling tool
Not all scheduling tools are built for bulk work. Some are designed for scheduling individual posts and become clunky when you're trying to queue dozens at once.
Features that matter for bulk scheduling:
- Calendar view for visualizing your scheduled content
- Ability to schedule to multiple platforms from one interface
- Drag-and-drop rescheduling for quick adjustments
- Bulk upload capability for images and videos
- Draft saving so you don't lose work
- Queue features for evergreen content recycling
When you need to schedule posts to multiple platforms, having a unified dashboard becomes essential. Jumping between native schedulers for each platform eliminates most of the time savings bulk scheduling provides.
| Feature | Why it matters for bulk scheduling |
|---|---|
| Multi-platform support | Schedule once, post everywhere (with platform-specific adjustments) |
| Visual calendar | Spot gaps and overlaps before they happen |
| Media library | Store and reuse assets without re-uploading |
| Hashtag management | Save sets for quick insertion |
| Team collaboration | Share drafts and get approvals in one place |
| Analytics integration | See what's working without leaving the tool |
The case for dedicated scheduling tools over native schedulers
Instagram, Facebook, LinkedIn, and others all offer native scheduling. So why use a third-party tool?
Native schedulers work fine for occasional scheduling. But for true bulk scheduling across platforms, they create problems:
- You're constantly switching between apps and browser tabs
- Each platform has different scheduling interfaces to learn
- You can't see your full content calendar in one place
- Cross-posting requires manual copy-pasting
- Analytics are siloed, making performance tracking tedious
A unified social media automation approach consolidates all of this into one workflow. The time savings compound the more platforms and posts you manage.
Platform-specific bulk scheduling strategies
Each platform has quirks that affect how you should approach bulk scheduling. What works on LinkedIn will flop on TikTok. Here's how to adapt your approach.
Instagram bulk scheduling
Instagram now supports native scheduling for feed posts, but Stories and Reels require third-party tools for bulk scheduling. For feed posts, focus on visual consistency when scheduling in bulk. Use your calendar view to ensure your grid looks cohesive.
Specific tactics for Instagram:
- Schedule carousel posts during high-engagement windows (they get shared more)
- Pre-write first comments with additional hashtags to boost reach without cluttering captions
- Plan Reels content around trending audio (though trends move fast, so schedule closer to posting date)
- Use the grid preview feature to check visual flow before finalizing your schedule
LinkedIn bulk scheduling
LinkedIn's algorithm favors native content and penalizes external links. When bulk scheduling, structure your content accordingly:
- Schedule text-only posts for thought leadership (these often outperform image posts)
- When sharing links, put them in the comments instead of the main post
- Schedule document carousels (PDF uploads) for educational content
- Avoid weekend scheduling unless your data shows audience activity
LinkedIn is particularly sensitive to engagement in the first hour. Schedule posts when you can actually respond to comments, not just when your audience is online.
TikTok bulk scheduling
TikTok's For You Page algorithm is less time-dependent than other platforms, which actually makes bulk scheduling more viable. Videos can go viral days or weeks after posting.
- Schedule more volume on TikTok than other platforms (the algorithm rewards frequent posting)
- Batch film content in "content days" then schedule the edits over several weeks
- Use scheduling tools that support TikTok's specific features like auto-posting
- Leave room for trending content that can't be scheduled in advance
X/Twitter bulk scheduling
Twitter's fast-moving nature might seem incompatible with bulk scheduling, but it's actually where bulk scheduling provides the biggest time savings. The platform rewards volume, and posting 5+ times daily manually is exhausting.
- Schedule recurring evergreen tweets (quotes, tips, resources) on rotation
- Use thread scheduling to queue educational content that builds authority
- Space tweets at least 2-3 hours apart to avoid flooding followers' feeds
- Schedule retweet-style content of your own past hits that performed well
Common bulk scheduling mistakes and how to avoid them
Bulk scheduling can backfire if you approach it wrong. Here are the mistakes I see most often, and how to fix them.
Mistake 1: Scheduling and forgetting
Bulk scheduling doesn't mean "set it and forget it." You still need to monitor posts, respond to comments, and engage with your audience. Automated posting without human engagement looks robotic and damages relationships.
The fix: Block 15-30 minutes daily for engagement, separate from your scheduling session. Check what's posted, respond to comments, and engage with others' content. Scheduling handles distribution. You handle connection.
Mistake 2: Ignoring real-time events
Your perfectly scheduled post about productivity tips hits right as a major news event dominates the conversation. Your brand looks tone-deaf or out of touch.
The fix: Check your scheduled posts daily against current events. Most scheduling tools let you pause or reschedule with one click. Build this check into your morning routine.
Mistake 3: Over-scheduling promotional content
When bulk scheduling, it's tempting to load up on sales-focused content because it feels efficient. But audiences quickly tune out accounts that only promote.
The fix: Stick to your content mix template (remember: 10% promotional max). Use your calendar view to visually confirm you're not clustering promotional posts together.
Mistake 4: Neglecting engagement triggers
Scheduled posts often miss opportunities to spark conversation because they weren't written with real-time engagement in mind. They make statements instead of asking questions.
The fix: End 30-50% of your scheduled posts with questions or calls for input. "What's your take?" "Which approach works better for you?" "Share your experience in the comments." This transforms one-way broadcasting into two-way conversation, even with scheduled content.
Mistake 5: Scheduling too far in advance
Scheduling an entire month at once feels productive, but social media moves fast. Content scheduled 30 days out might reference outdated trends, old product versions, or irrelevant topics.
The fix: Schedule 1-2 weeks maximum for most content. You can schedule evergreen content further out, but time-sensitive material should have shorter lead times. Build flexibility into your system.
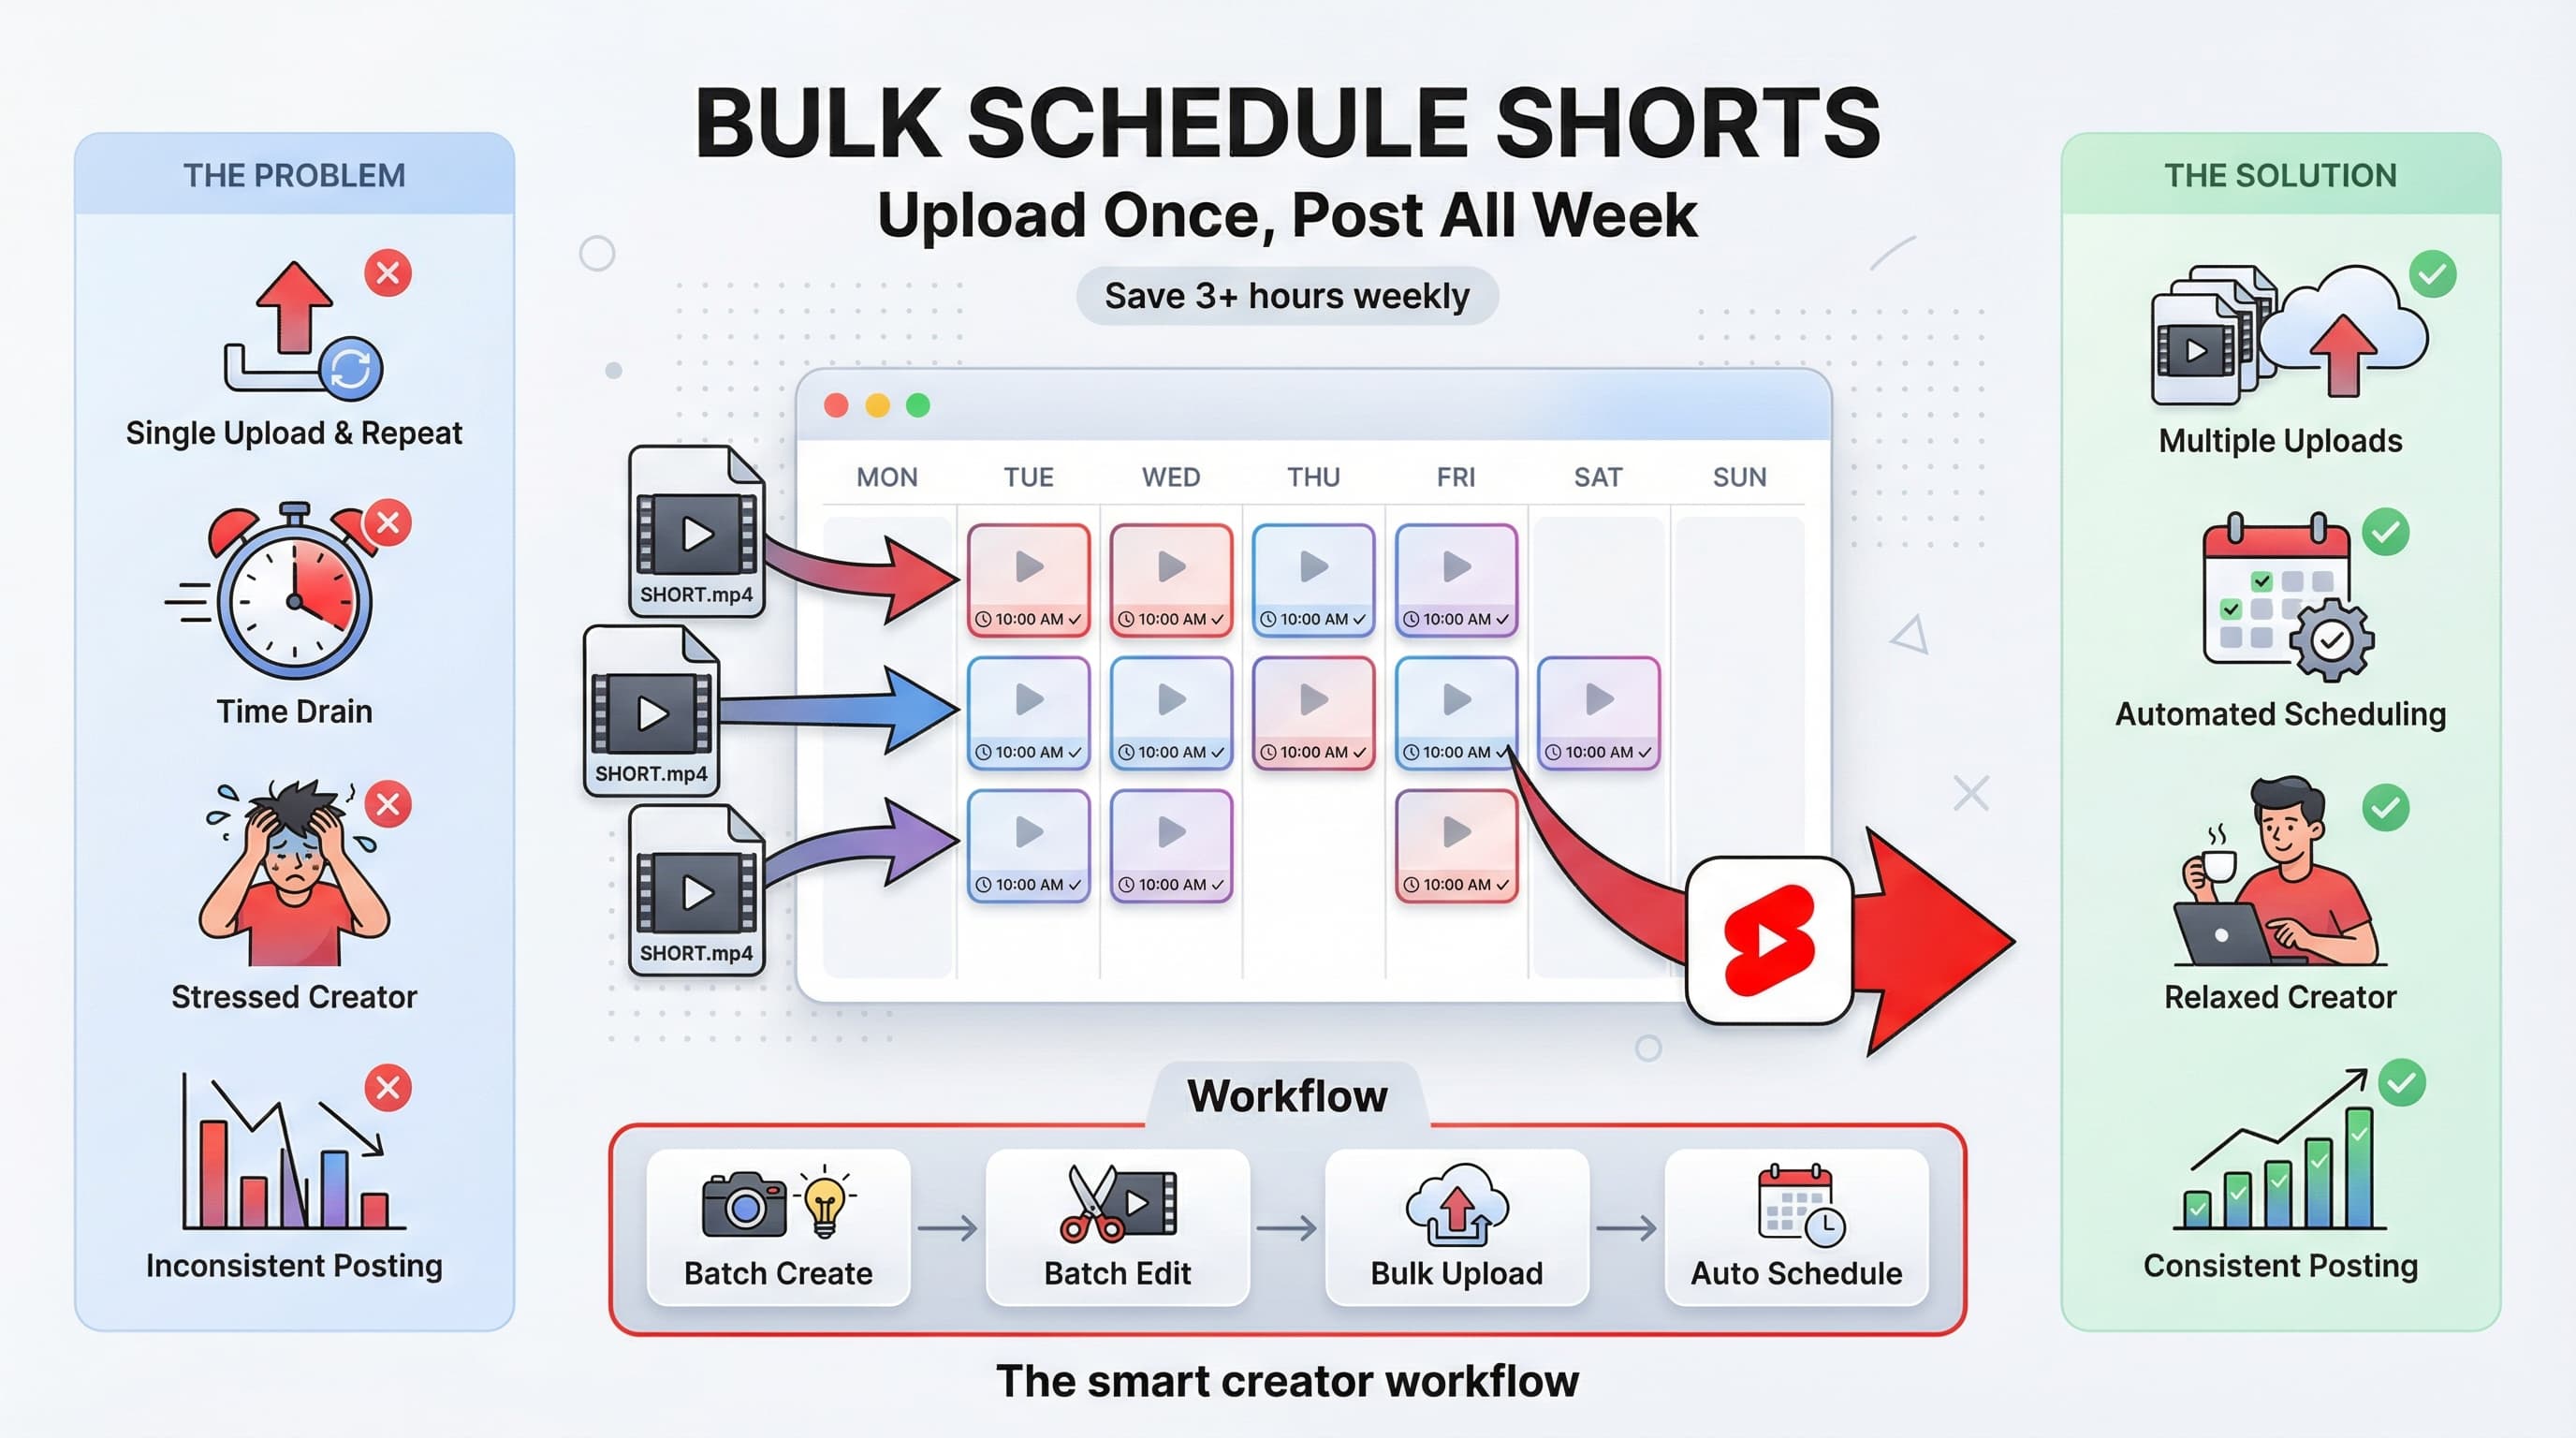
Advanced bulk scheduling techniques
Once you've mastered basic bulk scheduling, these advanced techniques can further improve efficiency and results.
Technique 1: Content batching days
Take bulk scheduling further by dedicating entire days to content creation. Instead of creating content throughout the week and scheduling it during another session, combine both.
A sample content batching day:
- Morning: Film all video content for the next 2-4 weeks
- Early afternoon: Edit videos and create graphics
- Late afternoon: Write all captions and copy
- End of day: Schedule everything across platforms
This extreme batching approach works especially well for video-heavy content creators. Learn more about this approach in our guide to batch creating content.
Technique 2: Evergreen content queues
Not all content has a shelf life. Tips, quotes, educational content, and foundational information stays relevant for months or years. Create a separate queue for this evergreen content that cycles automatically.
How to implement this:
- Build a library of 50-100 evergreen posts
- Set them on rotation with gaps between repeats (30-60 days minimum)
- Periodically refresh the content to prevent staleness
- Use evergreen queues to fill gaps in your main schedule
Technique 3: Template-based scheduling
Create templates for recurring content types so you're not starting from scratch each session. A "tip of the day" post always follows the same format. A case study always has the same structure. A weekly roundup uses the same layout.
Store these templates in your scheduling tool or a separate document. During bulk scheduling, you're filling in templates rather than creating from zero. This cuts scheduling time by 30-40% once you have a solid template library.
Technique 4: Analytics-driven optimization
Use your scheduling tool's analytics to continuously refine your approach. After each week, review:
- Which post types got the most engagement?
- What posting times performed best?
- Which platforms drove the most results?
- What captions or formats underperformed?
Feed these insights into your next bulk scheduling session. If carousel posts consistently outperform single images, schedule more carousels. If Tuesday at 9am beats Thursday at 3pm, adjust your schedule accordingly.
Building your bulk scheduling routine
Consistency matters more than perfection when building a bulk scheduling habit. Start simple and refine over time.
Week 1-2: Start with one platform
Don't try to bulk schedule everything at once. Pick your primary platform (the one where you get the most results) and master bulk scheduling there first. Get comfortable with the workflow, tools, and timing before expanding.
Week 3-4: Add a second platform
Once your first platform runs smoothly, add your second most important platform. Adjust your scheduling session time to accommodate the additional work. This is also when you'll start seeing the real time savings, since you're doing two platforms in less time than it would take to post manually on one.
Month 2: Scale to all active platforms
By now you should have a rhythm. Add remaining platforms and refine your content mix across all of them. This is also the time to start building your evergreen content library and experimenting with advanced techniques.
Month 3 and beyond: Optimize and automate
With the basics handled, focus on optimization. Test different posting times. Refine your templates. Build out your content bank. The goal is to make each bulk scheduling session faster and more effective than the last.
Measuring the impact of bulk scheduling
Time savings are great, but bulk scheduling should also improve your social media results. Here's how to measure both.
Time metrics to track
- Hours spent on posting per week (before vs. after)
- Number of posts published per week
- Time per post (total scheduling time divided by posts)
- Consistency score (percentage of planned posts actually published)
Performance metrics to track
- Engagement rate per platform (before vs. after bulk scheduling)
- Follower growth rate
- Post reach and impressions
- Click-through rates on links
- Response time to comments (ensure this doesn't drop)
Run this comparison after 30, 60, and 90 days. Most people see improved performance alongside time savings because consistent posting gets rewarded by algorithms, and batch-created content tends to be higher quality than rushed, real-time posts.
The bottom line on bulk scheduling
Bulk scheduling social media posts isn't just about efficiency, though reclaiming 3-5+ hours per week is a significant benefit. It's about building a sustainable system for social media that doesn't depend on your daily motivation or memory.
The best social media managers aren't the ones posting constantly. They're the ones who've built systems that maintain consistent presence while freeing them to focus on strategy, engagement, and creativity. Check out our scheduling features for Instagram and TikTok to get started.
Start with one platform. Master the workflow. Expand from there. Within a month, you'll wonder how you ever managed social media any other way.
1. Audit your current posting situation (30 minutes)
2. Choose a scheduling tool and set up your accounts (30 minutes)
3. Define your posting frequency and content mix (15 minutes)
4. Gather assets and schedule one week of content for your main platform (90 minutes)
5. Review and adjust after one week, then expand to additional platforms
Try Schedulala for free
Schedule posts to Bluesky, Twitter, and 8 other platforms from one dashboard.
Get started for free→